Manual Processing of Edgings
The edgebanding machine has become an indispensable part of every workshop. In some cases, however, you still have to get along without a machine - for example on site or when working with shaped parts or round workpieces. We have in our range some useful tools for the individual steps of manual bonding:
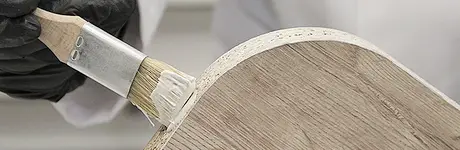
Apply the glue to the edging and press it onto the substrate. To press the edging onto the substrate, use a piece of wood for protection. Apply clamps and press the edgings for approx. 30 minutes.
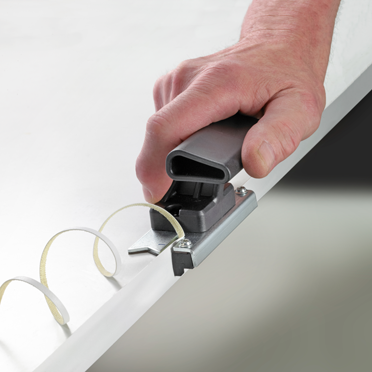
2. Removal of Lateral Protrusions
After taking off clamps and pressing aids, you can remove protrusions of the edging with an edge trimmer. Depending on the thickness of an edging, there are different tools available. For up to 1 mm thick edgings, we offer the edge trimmers Covermatic and AU93. While Covermatic works like a plane and can only be used on one side of the edging at a time, the edge trimmer removes protrusions on both sides of the edging at the same time. A useful alternative for edgings of up to 1.5 mm thickness is our edge trimmer RP28. It only cuts one side of the edging at a time, but it has an integrated scraper that can be used to post-process the radius in an additional step. For edgings from 2 mm thickness, we recommend the use of a router.
3. Cutting the Edging Protrusion at the End of the Board
To trim edgings exactly at the corners of right-angled workpieces, we have in our range 5 different guillotines. They are all suitable for cutting ABS, melamine and veneer edgings and trim the edging with one clean cut.
Tips for Trimming Edgings on Round Workpieces:
Anyone who has ever edged a round top knows the problem: if you cut the edging too much, this will result in an unattractive joint where the edgings meet. That is why you prepare an edging with a protrusion of approx. 2 - 5 cm before applying it. To ensure a flush joint, we recommend our guillotine KG20R for butt joint gluing. It allows you to cut the edging just 0.5 to 1 mm before the butt. The hotmelt adhesive will have cooled down by this point, so reactivate it with a hot-air gun and put pressure on the end of the edging using a small cork block. The heat will cause the edging to expand and it will fit precisely to the butt. Hold it for a while, until the glue has set, and the edging fits perfectly.
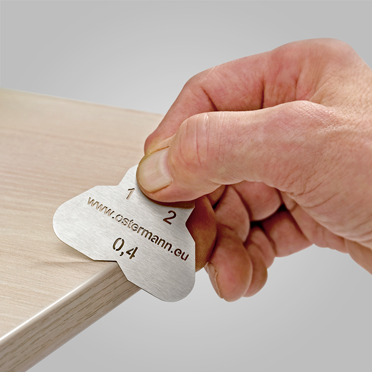
To rework the radius, you can use our REDOCOL hand scraper or REDOCOL scraper for radius. The latter makes radius processing particularly easy, since its has cut-guiding recesses for edgings of 0.4, 1 or 2 mm thickness.
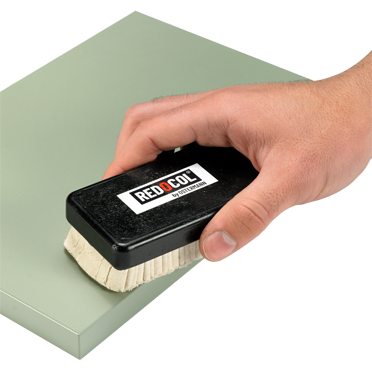
6. Finish: Removal of Stress Whitening
Milling down plastic edgings can frequently result in minor tool marks and stress whitening. Our REDOCOL sisal brush with its special sisal-cloth combination is an ideal tool for smoothing edgings and removing processing traces as well as material residue and stress whitening. This way you can achieve a radius shining with the same colour brilliance as the edging.
Tips for Removing Stress Whitening in Tight Radii:
In tight radii, stress whitening can sometimes also occur on the upper surface of the edging. A conventional hot-air gun can help. Heating the material will make the white areas disappear from the edging. Quickly re-polish the milled radius with the sisal brush - finished!