Processing of Edgings

Our experts are always available to offer advice and support for carpenters/cabinet makers. Find tips and advice that can help you with the processing of edgings:

1. How can I securely apply edging to a board while not in the workshop?

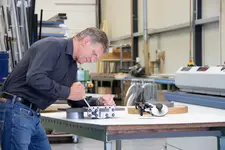
Mobile edgebanding machines, as e.g. the Wegoma set, allow you to apply edgings safely and easily to boards on the construction site. If you don't have a machine, you can alternatively use one of our T-bar edgings. We can also retrofit all ABS edgings from a thickness of 2 mm with a T-bar. This is how: mill 3.5 mm wide grooves into the boards, tap in the T-bar edging after applying REDOCOL Kantol greenline edging glue, mill flush after one hour, done. For the processing of mitred boards or protrusions, the T-bar can be fitted more on the right or the left side of the edging upon customer request.

Special tip: If you work with special requirements, e.g. in the kitchen, laboratory or bathroom, you can also use mobile edgebanding machines to process PUR adhesive. When the work is done, stir half a handful to a handful of blue PUR cleaner granulate into the gluepot and allow a residual edging to run through until the PUR/cleaner mixture is on the roller. The hardened mixture can then be reheated and removed the next day.

2. ABS edgings covered with a layer of real aluminium or solid aluminium - What is the difference?

We have various aluminium edgings in our range. ABS edgings with real aluminium surfaces are easier to process, as with other ABS edgings. In addition solid aluminium edgings are available to carpenters/cabinet makers on rolls or in straight lengths. These are of course somewhat more challenging to process. PUR adhesive should be applied to solid aluminium edgings. Heat up the whole edging before its application in a heating press or another heat source to 45-50 °C, so that the adhesive does not set too quickly. Milling will be easier if you apply a very thin layer of Teflon oil on both milled ends of the roll. Caution! Teflon must not get onto the adhesive side!

Tips for processing: You can heat up the carrier plate for the aluminium edging with a hot air device in order to keep the edging at a consistent temperature.

3. Which edging is better? 1 or 2 mm?

hat depends entirely . . . With a 1 mm edging you can have of course a considerably smaller radius. Then the edging is in line with the modern trend towards straight, clean lines and sleek furniture. The 2 mm edging, also known as safety edging, is, as the name suggests, noticeably more stable and impact resistant. In fact even 3 mm thick edgings are being used in the industrial manufacture of furniture – and for good reason.

Our tip: Our experts still recommend the 2 mm safety edging.

The only exception is for modern sleek furniture with clean lines.

4. Processing of T-bar edgings

ABS edgings with an added T-bar or double T-bar (groove milling 3.5 mm) can be processed with an outer radius of 30 mm. It is essential that in the range of the radius, the T-bar is cut up to the edging every 3 mm. Under equal conditions, an inner radius from 40 mm can be realised, as well. For outer radii, we recommend you to always hammer in the T-bar edgings while under tension. For inner radii, the edgings should be hammered in with pressure against the radius. Use a rubber hammer or a felt-coated tap-block.

The following radii can be realised with our T-bar edgings:

ModelOuter radius
(with cut T-bar)
Inner radius
T-bar edging Ideal30 mm (20 mm)30 mm
T-bar edging Kompakt(20 mm)30 mm
T-bar edging Parat20 mm30 mm
T-bar edging Classic40 mm40 mm
T-bar edging (30 mm)(40 mm)60 mm
T-bar edging (25 mm)(30 mm)60 mm
T-bar edging Ergosoft(30 mm)40 mm
T-bar edging Standard20 mm20 mm
T-bar edging Tablo(50 mm)80 mm
Language
GB
© 2025 Rudolf Ostermann GmbH