Useful Tools for a Perfect Edging
Our experts are always available to offer advice and support for carpenters/cabinet makers. Find tips on useful tools that will facilitate your edging work and lead to perfect results:
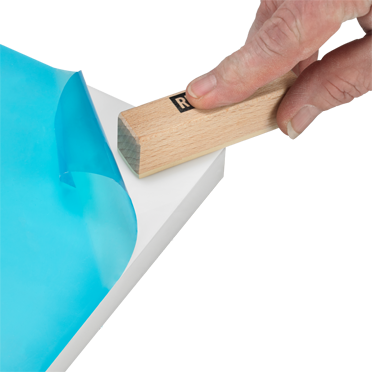
1. What's the easiest way to remove protective film from high-gloss edgings and fronts?
Our high-gloss edgings are always delivered with a protective film. This protects delicate surfaces during processing and shipment. However, once the work piece is finished it is not always easy to remove this practical protective film, especially from milled edges. In a property containing numerous cabinet fronts, this can quickly take up a working hour here or there. For those wanting to save time we recommend the REDOCOL film remover: This small but highly practical tool enables film to be removed quickly and precisely. The coated wooden block can of course be also used for cabinet fronts and larger surfaces.
Useful tip: Just once, record the time needed to remove the film from fronts and edgings. And you'll quickly see ... with the REDOCOL film remover the work will take just half the time.
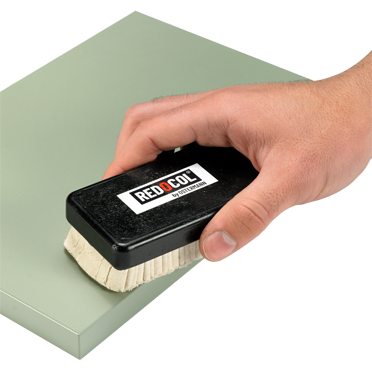
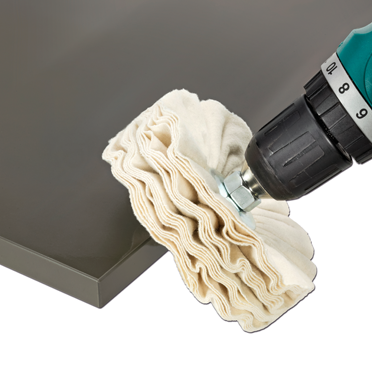
2. What is the best way to get rid of stress whitening?
Milling down plastic edgings can frequently result in minor tool marks and stress whitening. For smoothing milled edgings, we recommend the REDOCOL sisal brush. Its special sisal-cloth combination helps remove tool marks and stress whitening. For those places that the milling machine cannot reach, we recommend that you manually rework the radius with our scraper for radius and then finish off the edging with the sisal brush.
Useful tip: In tight radii stress whitening can sometimes also occur on the upper surface of the edging. A conventional hot-air gun can help. Heating the material will make the white areas disappear from the edging. Quickly re-polish the milled radius with the REDOCOL sisal brush- finished!
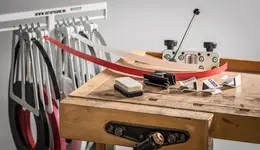
3. How can I cut the edging for a round top so that it fits precisely?
Anyone who has ever edged a round top knows the problem: If you cut the edging too much, this will result in an unattractive joint when the edges meet. That is why you prepare an edging with a protrusion of approx. 2 - 5 cm before applying it. To cut the overlap so that the edges fit flush, our OSTERMANN experts recommend using a butt joint guillotine. This allows you to cut the edging just 0.5 to 1 mm before the butt. The hotmelt adhesive will have cooled down by this point, so reactive it with a hot-air gun and put pressure on the end o the edging using a small cork block. The heat will cause the edging to expand and it will fit precisely to the butt.
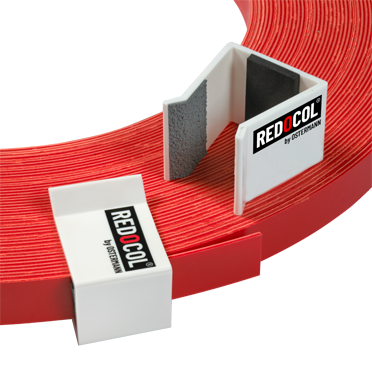
4. I have opened an edging roll; how do I stop it unwinding by itself?
To prevent opened edging rolls from unwinding or getting tangled up with one another, our experts recommend simple edging clasps. Or alternatively use Hook and loop fastener. We deliver this in roll form, e.g. REDOCOL, or as packaged Hook and loop tapes with eyelets.
Useful tip: Anyone wanting to keep opened edging rolls ready to hand close beside their edgebanding machines should really take a look at our mobile Edging Organiser!
5. How can I subsequently add a high-gloss finish to acrylic edgings?
Alongside its broad range of high-gloss 3D acrylic edgings, we also stock numerous acrylic edgings with surfaces not having a high-gloss finish. If you want to offer your customers an extraordinary edging look, it is possible to subsequently add a high-gloss finish to 3D acrylic edgings with the aid of a polishing disk and buffing paste. The pattern embossed on the underside of the edging is protected by the overlying acrylic layer, while the polishing process gives it gloss and depth.
Useful tip: To achieve this kind of "wow effect", we recommend you use abrasive polish. This is best applied with a polishing ring (ø 125 mm, 14 mm drill hole). The polishing ring can be easily fitted to the drill with the aid of an arbour.