

 English
6 Tips for a Perfect Edging Finish
 When bonding furniture edgings, it all comes down to extreme precision. This is the way to achieve best results. Whether applying cutting-edge zero bondline technology or using conventional EVA or PUR adhesive: first-class results can only be achieved if all production steps in the processing of edgings are perfectly coordinated. Succeed in achieving the optical zero bondline using the following 6 tips:
Discover all products for edging processing
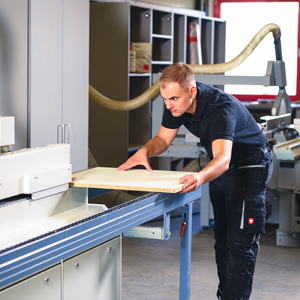
The tools used for workpiece preparation are the basis for perfect joints between board and edging. A top quality cutting tool is critical for the quality of the joint. In the our experts' experience, the best results can be achieved with diamond-tipped tools.
If there is too much pressure exerted by the main pressure roller, the edging will lift from the corners of the board and the joint will remain visible across the last 4 to 5 cm of the workpiece. The optimal pressure lies between 1.5 and 3.0 bar on the main pressure roller and between 3 and 4 bar on the following pressure rollers.
If you process e.g. thicker edgings or post forming / soft forming profiles and want to round off the corners of the edging material, we recommend protrusion cutting for the lengthwise edge. Protrusion cutting should be switched off when processing the crosswise edgings.
The flush trimming is followed by the radius or chamfer trimming. If too much material is removed at this point, it will not be possible to complete the finishing step satisfactorily. The rule here: Leave 0.1 to 0.15 mm for the scraper to remove. This helps prevent tool / chatter marks occurring on the edging surface. It goes without saying that sharpened tools should be used to achieve optimum levels of workmanship.
During the flush trimming and profiling of glued edging strips, the milling machine blade leaves fine points of unevenness (chatter marks) on the edging surface (tool marks). These optical defects are removed using the profile scraper. It is important for the scraper to be set up perfectly. If the scraper is set too low, this will result in clearly visible joints and the board will be "open" and susceptible to moisture penetrating. This can result in swelling of the board.
Glue joint scraper and buffing unit take care of the final touch. The glue joint scraper removes oozed glue from the board's top and bottom by flush separation of the glue bead. Sharp tools are as essential as clean, non-clogged tool blades. In a final step, the buffing unit takes up soiling, milling remnants and excess cleaner, while polishing the radius of the edging at the same time. Important with the buffing unit are the right setting and adjustment towards the board's edge, as well as the degree of soiling on the buffing disc. Heavily polluted polishing discs can leave soiling and ugly marks on bright glue joints. Buffing discs should therefore be changed on a regular basis. We recommend a combination of sisal and cloth.